


3D printing is a method of creating a three-dimensional object layer-by-layer from a digital file. It enables you to produce complex shapes using less material than traditional manufacturing methods.
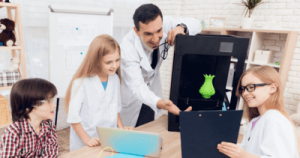
3D printing is continuing to make its way into schools, colleges, and universities in almost every country. Many schools are using 3D printing techniques to provide a better experience to their students and teachers.
To introduce this technology, first you will need a 3D CAD (Computer Aided Design) software to create the 3D model and then now you will need a 3D printer to turn the CAD file into a physical object.
When students see a picture on a computer screen, they don’t get sufficient information from that picture. But when you use 3D printing, students get comprehensive information from the 3D models.
3D printing has so many uses in school.
Here are few examples of how schools and students can use 3D printer in the classroom:
- Engineering design student can print out prototypes
- History students can print out historical artifacts
- Graphic design students can print out the designs they have created
- Geography students can print out topography, demographic, or population map
- Chemistry students can design and print 3D models of atoms and molecules
- Math students can print out “problems” to solve in their own learning spaces,
Though there are many other benefits not mentioned here, the above are some of them.
How 3D Printing Works?
Create Models Using 3D Modeling Software
As we have mentioned earlier, the first thing required for 3D printing is a 3D modeling software. A 3D modeling software enables you to create unique 3D models that you can later print by using 3D printer.
 There are many types of 3D modeling software and EdTech tools available in the market such as TinkerCAD, SelfCAD, Fusion 360, and Cinema 4D. You can use this software to create 3D models. The only challenge with most of them is complexity as well as high cost. So, for schools we recommend using affordable programs like TinkerCAD and SelfCAD. TinkerCAD is great for introducing 3D modeling to your students as you can use it to create simple models easily. The challenge with this program is that it’s hard to use it for creating complex models and that’s why SelfCAD comes in now.
SelfCAD is similar to TinkerCAD in functionality and ease of use; but the difference is that SelfCAD can be used to create both simple and complex models. There are both online and downloadable versions. For teachers, the interactive tutorial tool of SelfCAD allows you to record your 3D modeling process and even share it with your students to follow. The instructions generated by this tool are easy to follow and students don’t have to spend hours following complex tutorials on YouTube.
Use Slicing Software to Prepare G-code
Besides 3D modeling software, you will also need slicing software. Slicing software translates the 3D design into G-code (a generic name for a computer language) that a 3D printer can understand and print.
Slicing software is a necessary element of 3D printing because 3D printers cannot translate a CAD design file by themselves. They need the specifications of the object you design to be translated into a language which they can interpret.
There are several kinds of slicing software available such as, SuperSlicer, Slic3r, Ultimaker Cura, Simlify 3D, FlashPrint, and Eiger. But, for those using SelfCAD, there is an in-built slicer to help you prepare your design for 3D printing. So, you don’t need to switch to another separate software.
Use 3D Printers to Print Final Design
The final process for printing a design is using a 3D printer. A 3D printer is the most important thing because all of your work depends on the functionality of a 3D printer.
The world is changing, and education technology must change with it. That’s why schools are introducing 3D designing and looking for the best 3D printers for kids for education. As a result, a number of 3D printers have been designed specifically with the classroom in mind.
Before choosing a 3D printer, you should look for some important features in the printer, such as:
- The 3D printer should be easy-to-use
- It should have print resume function
- Choose a printer that works best for you. There are three different technologies used for 3D printing but most of the school choose the FDM (Fused Deposition Modeling) printer
- Safety: If you are working with children, then you should consider cybersecurity and safety as the first priority
- Look for a 3D printer that provide multi-colour printing
- Speed: Before purchasing a 3D printer, check the speed of printer
- Resolution
- Print Volume
These are some of the features you should look for in a 3D printer. That is, ease of setting up, cost, and overall performance. You need a 3D printer that is cheaper, easy to set up and doesn’t frequently break down. There are several 3D printers available in the market.
Here are some of the most highly rated 3D printers for schools and education settings:
- Dremel 3D40 EDU
- Makerbot Sketch Solution
- Tinkerine Ditto Pro
- Ultimaker 3
- ANYCUBIC Mega-S
- Dremel Digilab 3D45
- QIDI TECH X-MAX
- FlashForge Creator Pro
These are some of the best performing 3D printers for schools you can use in your institution. You can purchase any 3D printer as per your need, and that best matches with the requirements of your setting.
3D modeling and printing is changing the way of learning all around the globe. Many schools are using 3D printers to provide an enhanced experience to students in addition to using online learning platforms. You should also inform yourself about the use of 3D printing technology to improve the quality of learning.


